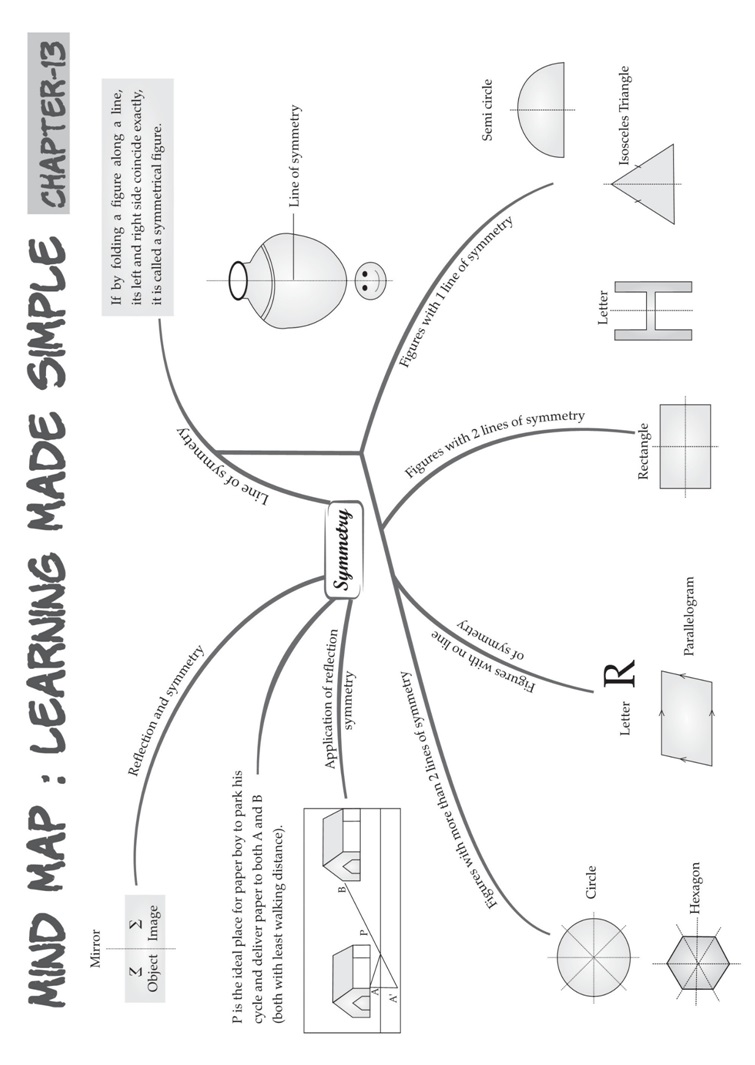
SYMMETRY
Symmetry And Line Of Symmetry Definition
The symmetry of an object is defined as one half of the object is a mirror image of the otherhalf. When an object is split into
half, both the sides are exactly the same. The line which divides them is called the line of symmetry. One simple example
is reflection symmetry. The object can be divided into one or more than one lines of symmetry.
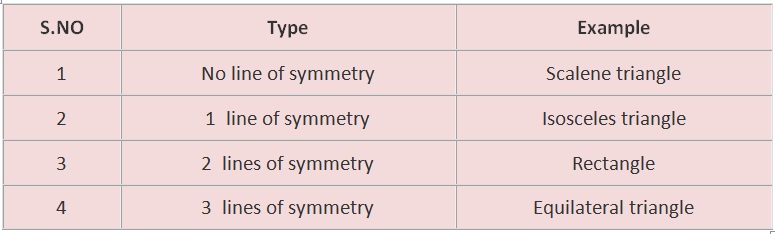
Below are some types of line of symmetry along with examples-
Introduction to Symmetry
When figures have equally balanced proportions, they are said to be symmetrical.

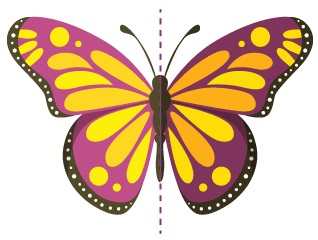
Bilateral symmetry
If a figure is divided into two halves by only one line and these halves overlap each other completely,
then the figure is said to have bilateral symmetry.
Example: A butterfly shows bilateral symmetry.
Line symmetry
A figure has line symmetry if a line can be drawn dividing the figure into two symmetrical parts.
The line is called a line of symmetry.
Example: The dotted lines in the following figures show line symmetry.
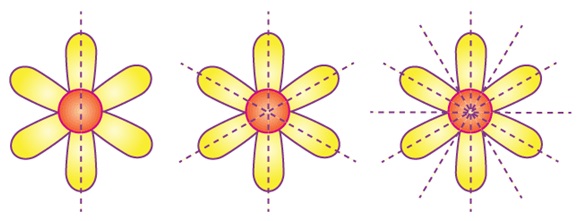
Lines of symmetry
A figure can have any number of lines of symmetry passing through it. Some can have one,
two or even multiple lines of symmetry.
Example of a single line of symmetry: A door lock.

Example of two lines of symmetry: A rectangle.

Example of multiple lines of symmetry (two or more): an equilateral triangle.

Point Symmetry and Reflection Symmetry
Reflection Symmetry
Reflection symmetry is very similar to line symmetry except for the change in orientation.

For example, when you view yourself in the mirror, your right hand becomes the left hand in the mirror.

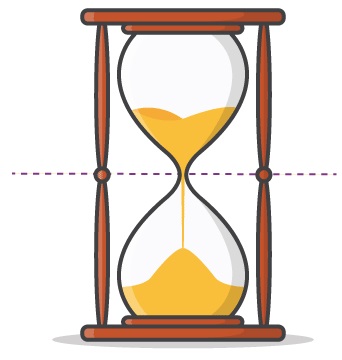
Point Symmetry
Point symmetry exists when a figure is drawn around a single central point.
It is for figures having a point through which the symmetry can be established.
This point is called the centre of symmetry.
For example, the hourglass shows point symmetry.
Kaleidoscope
A kaleidoscope uses mirrors to produce images that have several lines of symmetry.
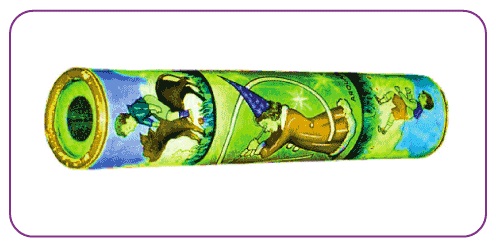
Usually, two mirror strips forming a V-shape are used.
The angle between the mirrors determines the number of lines of symmetry.
The figure below shows the pattern formed by a kaleidoscope.
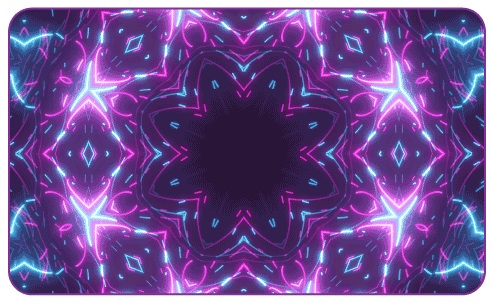
Principle Of Kaleidoscope
The basic principles used in the kaleidoscope are the law of reflection, and white light is a combination
of VIBGYOR. When the white light hits the surface of the mirror, it gets reflected at an angle such that
the angle of incidence is equal to the angle of reflection. Due to these multiple reflections of light,
there is a creation of these beautiful patterns.
According to the second principle, white light passes through the coloured objects present in the
kaleidoscope so that most of the light is absorbed by these objects.
Kaleidoscope Uses
Kaleidoscope is an optical toy consisting of two mirrors at a particular angle.
Some common uses of the kaleidoscope are:
Kaleidoscope produces beautiful patterns that are used by fashion designers.
A kaleidoscope is used as a toy for entertainment.
How to Make A Kaleidoscope?
Create a kaleidoscope and enjoy the various colours and patterns. Kaleidoscope works on the
principle of reflection. Let us learn how to make a kaleidoscope.
Things you will need:
Plastic (See-through and coloured)
Overhead Transparency Paper
Pencil
Masking/Duct tape (One Roll)
Mirrored Perspex (3 Pieces)
Procedure
Use the three pieces of mirrored perspex and roll them as tape in the form of a triangle.
Try to ensure that it has a solid and it is taped on the outside of the triangle.
Sketch the small triangle located at the edge of the kaleidoscope to the overhead transparency paper
(set aside 1 cm extra around the triangle to allow folding of the paper).
Keep the transparency paper to the kaleidoscope edge and cut the narrow openings at the corners,
which would facilitate the folding of the corners easily.
Attach the paper into a separate place.
Make another triangle by drawing it, and this time it should be 2 cm larger than the earlier one
Choose the kind of plastic colour you would like to put inside the kaleidoscope. Take off small paper
cuttings that would sit well on the transparent paper.
Place the coloured plastic at the end of the kaleidoscope that has a transparency paper and add another
transparency paper (triangle) a little bigger than the earlier one. Keep the second triangle upside down
so that there would be ample space for plastic to shift between the two transparencies.
Once you have finished making the kaleidoscope, design it beautifully with colours, glitters and so on.
What Happens Next?
You might have noticed that the kaleidoscope works on white light shifting through the mirrors inside.
When students look through the mirror, they will find different colour patterns owing to the symmetrical
design formed by the mirrors placed at the right places.
Hope you have understood how to make a kaleidoscope. Give it a try and enjoy creating your kaleidoscope.